Россия, Сургут


СДЕЛАЙТЕ СВОИ УРОКИ ЕЩЁ ЭФФЕКТИВНЕЕ, А ЖИЗНЬ СВОБОДНЕЕ
Благодаря готовым учебным материалам для работы в классе и дистанционно
Скидки до 50 % на комплекты
только до
Готовые ключевые этапы урока всегда будут у вас под рукой
Организационный момент
Проверка знаний
Объяснение материала
Закрепление изученного
Итоги урока

Была в сети 19.04.2024 14:13

Жильникова Анна Андреевна
Учитель математики
9 лет
Местоположение
Origami of Helena A. Verrill
Категория:
Математика
09.12.2016 15:50

Просмотр содержимого документа
«Origami of Helena A. Verrill»

Origami of Helena A. Verrill
Выполнила:
Жильникова Анна
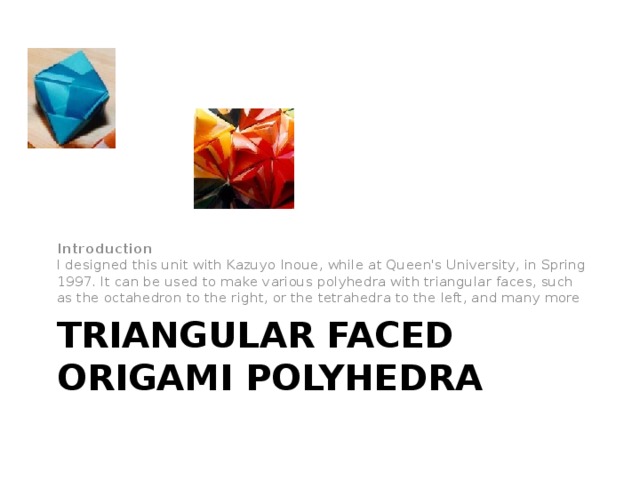
Introduction I designed this unit with Kazuyo Inoue, while at Queen's University, in Spring 1997. It can be used to make various polyhedra with triangular faces, such as the octahedron to the right, or the tetrahedra to the left, and many more
Triangular Faced Origami Polyhedra
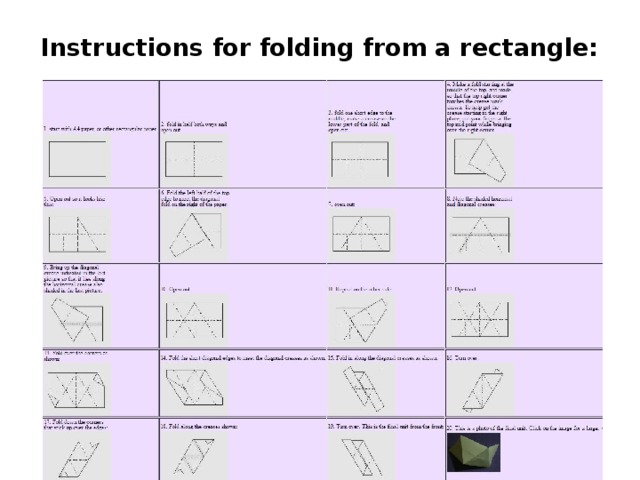
Instructions for folding from a rectangle:
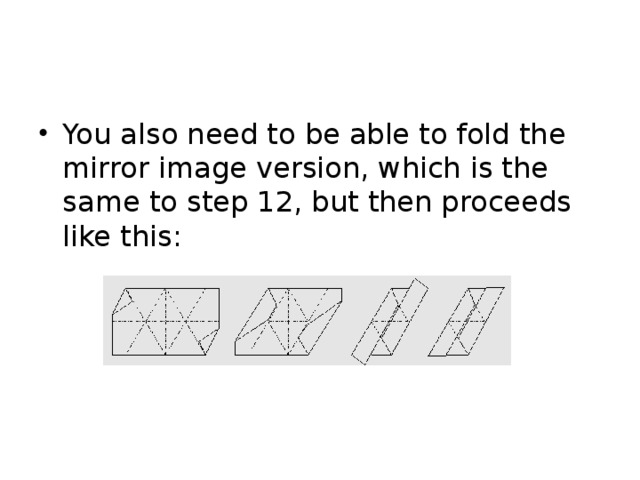
- You also need to be able to fold the mirror image version, which is the same to step 12, but then proceeds like this:
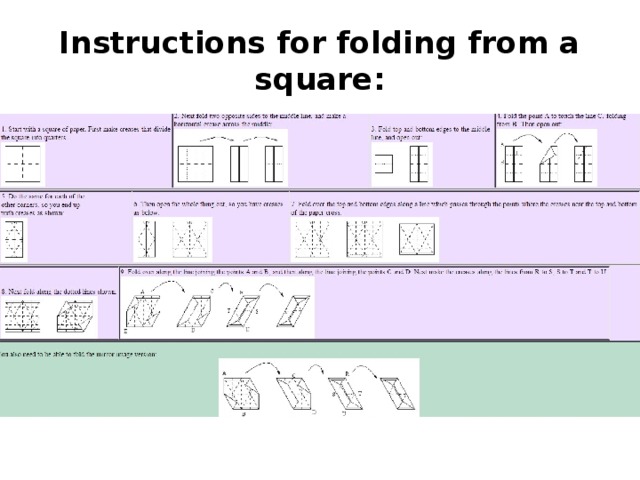
Instructions for folding from a square:
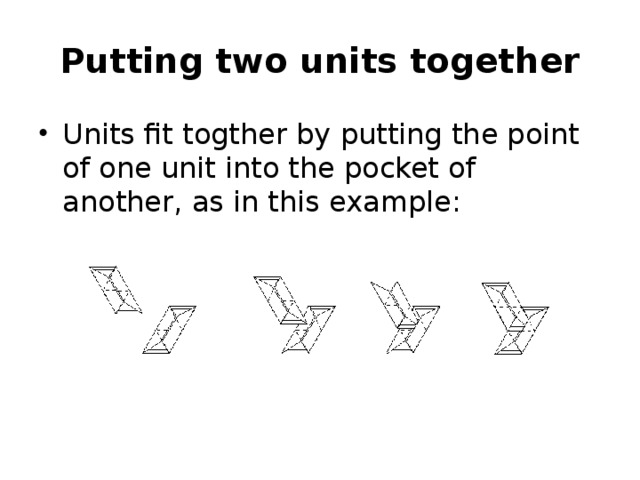
Putting two units together
- Units fit togther by putting the point of one unit into the pocket of another, as in this example:
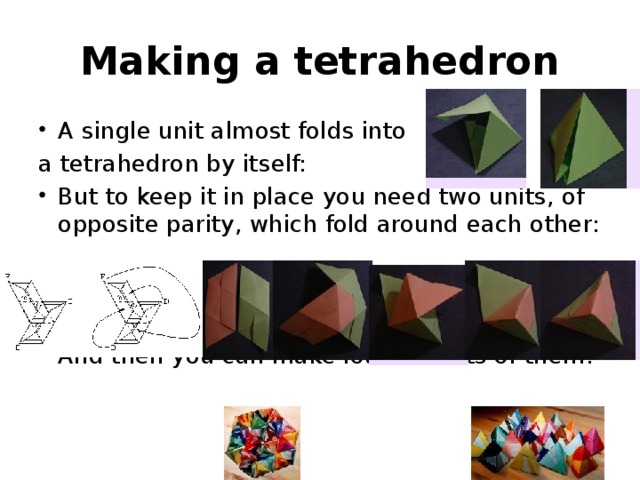
Making a tetrahedron
- A single unit almost folds into
a tetrahedron by itself:
- But to keep it in place you need two units, of opposite parity, which fold around each other:
- And then you can make lots and lots of them:

Making an octahedron
Images of tetrahedra and octahedra:

Making an icosahedron
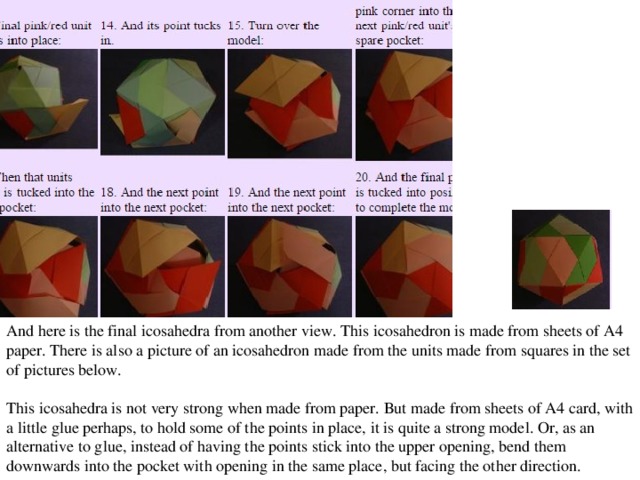
And here is the final icosahedra from another view. This icosahedron is made from sheets of A4 paper. There is also a picture of an icosahedron made from the units made from squares in the set of pictures below.
This icosahedra is not very strong when made from paper. But made from sheets of A4 card, with a little glue perhaps, to hold some of the points in place, it is quite a strong model. Or, as an alternative to glue, instead of having the points stick into the upper opening, bend them downwards into the pocket with opening in the same place, but facing the other direction.
Other examples
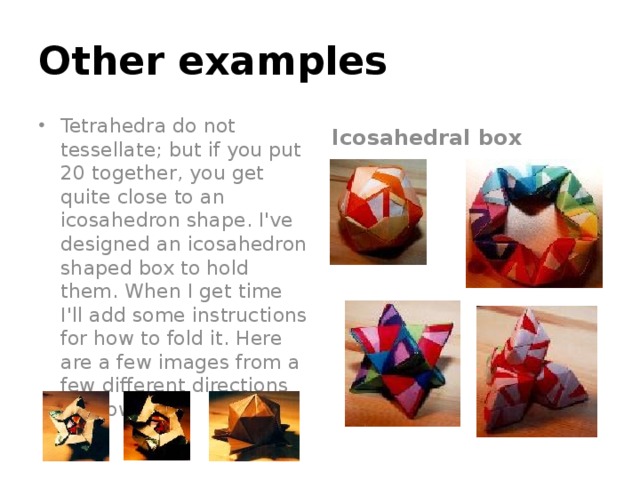
- Tetrahedra do not tessellate; but if you put 20 together, you get quite close to an icosahedron shape. I've designed an icosahedron shaped box to hold them. When I get time I'll add some instructions for how to fold it. Here are a few images from a few different directions for now.
Icosahedral box
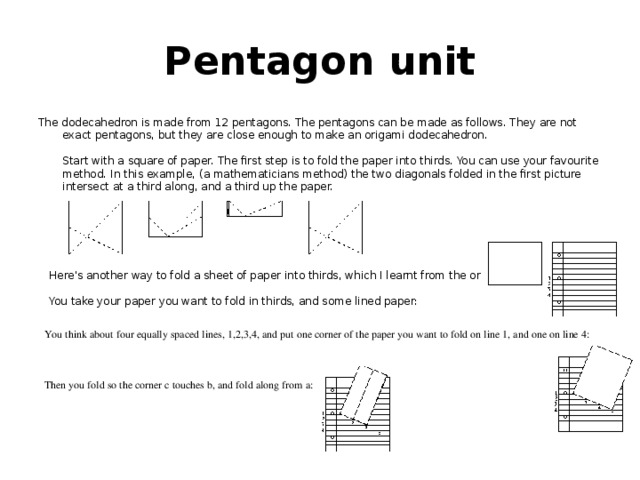
Pentagon unit
The dodecahedron is made from 12 pentagons. The pentagons can be made as follows. They are not exact pentagons, but they are close enough to make an origami dodecahedron. Start with a square of paper. The first step is to fold the paper into thirds. You can use your favourite method. In this example, (a mathematicians method) the two diagonals folded in the first picture intersect at a third along, and a third up the paper.
Here's another way to fold a sheet of paper into thirds, which I learnt from the origami-l mailing list. You take your paper you want to fold in thirds, and some lined paper:
You think about four equally spaced lines, 1,2,3,4, and put one corner of the paper you want to fold on line 1, and one on line 4: Then you fold so the corner c touches b, and fold along from a:

- Then fold along from b to get paper divided nicely into thirds. Anyway, suppose you've got your paper divided into three. Next, fold over triangles of sides 1 and 1/3, as below. Then fold over the other corners along the lines made by the first triangles folded over. Then fold the whole thing in half. The angle at the top is pretty close to 108 degrees. It's not exact, but this is just a poor man's pentagon. (what you do get, is that since you folded a third of the paper, there's an angle that's arctan(3), which is pretty close to 72, and the angle at the top is 180-arctan(3).) (Well, there's another problem that the sides of this diamond shaped thing might not be quite all equal; but they are pretty close.)
Then you have to fold over the long pointy parts to make a pentagon shape. There are creases you can match the points up with that give reasonable side lengths. (ie, the lines that divided the paper into three; they give lines from the points to a point on the opposite side to fold to.)
Finally, to make things a bit more secure, open it out a little; now you want to slip flap "a" underflap "b"; you do this while bringing the two points labeled "c" together, and this makes them stay together better. That's the pentagon done now. All you have to do is make 12, and fit them all together by putting the pointy bits into the slots created along the upper two edges of the pentagon. Note that there is one edge that is niether a point nor a slot; you'll get 12 of these in the total dodecahedron, and you should make sure they match up in 6 pairs. Note, if you use the ruled paper method, and only make one of the third creases, and then use the folded over edge of that one side of paper to mark where to fold from, you will end up with a pentagon with no creases on one side, and so you get a pretty neat dodecahedron.
Sonobe Module
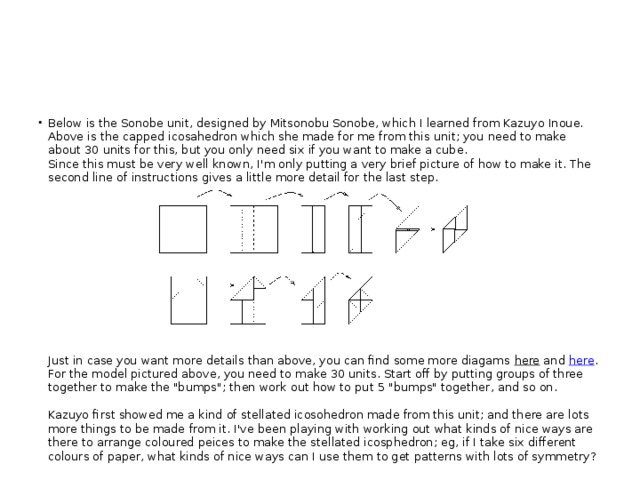
- Below is the Sonobe unit, designed by Mitsonobu Sonobe, which I learned from Kazuyo Inoue. Above is the capped icosahedron which she made for me from this unit; you need to make about 30 units for this, but you only need six if you want to make a cube. Since this must be very well known, I'm only putting a very brief picture of how to make it. The second line of instructions gives a little more detail for the last step.
Just in case you want more details than above, you can find some more diagams here and here . For the model pictured above, you need to make 30 units. Start off by putting groups of three together to make the "bumps"; then work out how to put 5 "bumps" together, and so on. Kazuyo first showed me a kind of stellated icosohedron made from this unit; and there are lots more things to be made from it. I've been playing with working out what kinds of nice ways are there to arrange coloured peices to make the stellated icosphedron; eg, if I take six different colours of paper, what kinds of nice ways can I use them to get patterns with lots of symmetry?
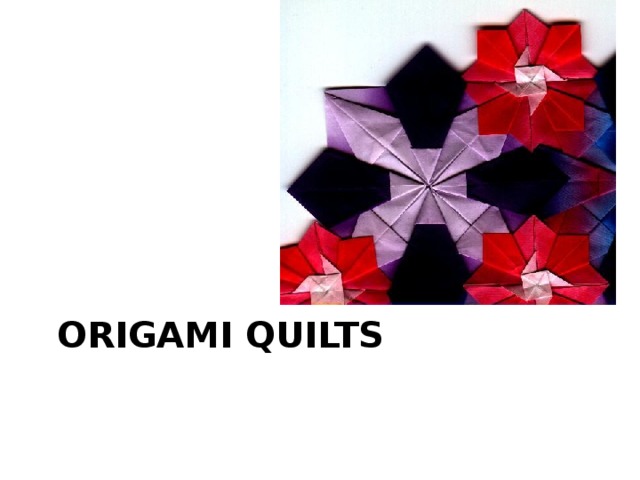
Origami Quilts
- There are some instruction for the first quilt on this page here .
- For the quilts below, see this page , which contains units folded to make polyhedra. By varying that unit a little, you get variation one , and variation two , which is the same as the units below.
- Let me know if you would like some more instructions for making these origami "quilts".
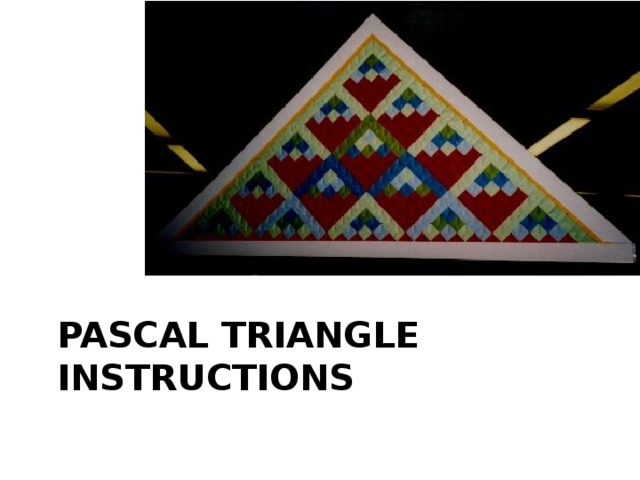
Pascal Triangle Instructions
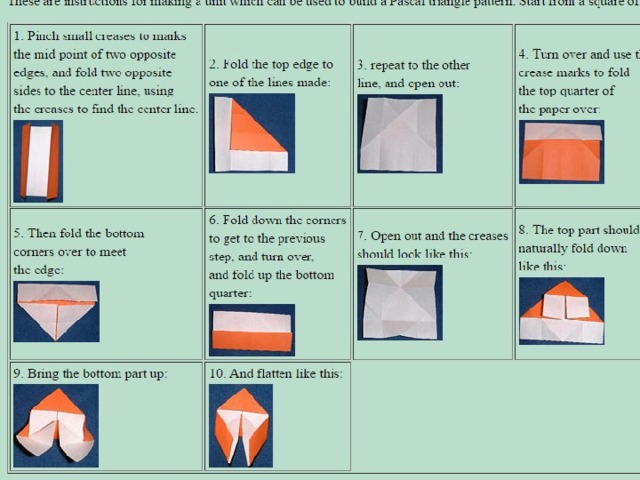
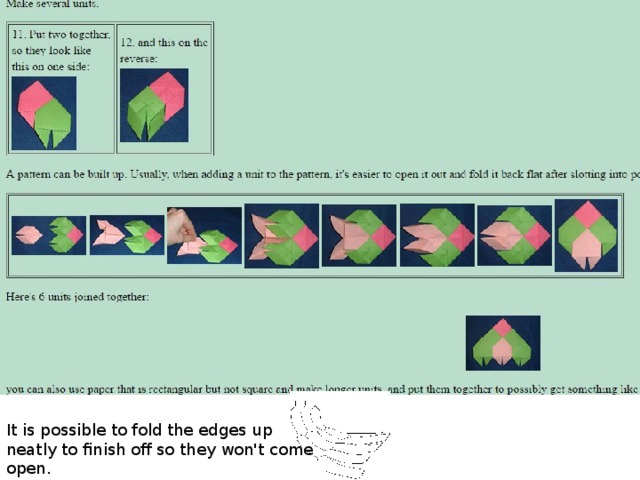
It is possible to fold the edges up neatly to finish off so they won't come open.
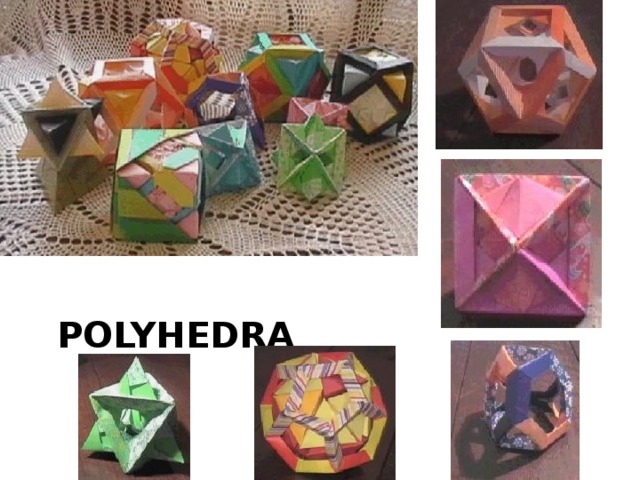
Polyhedra

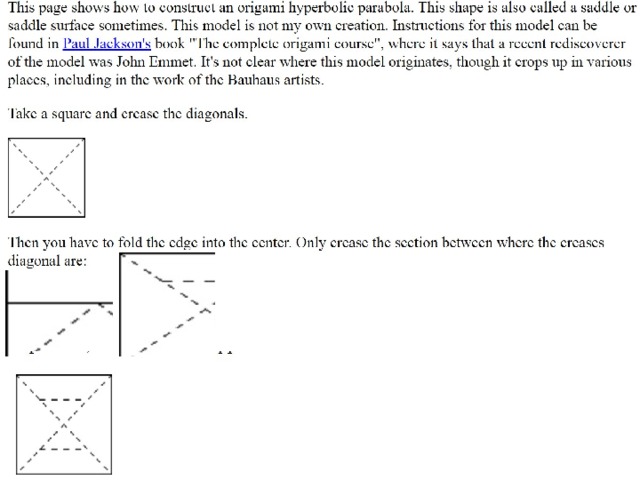
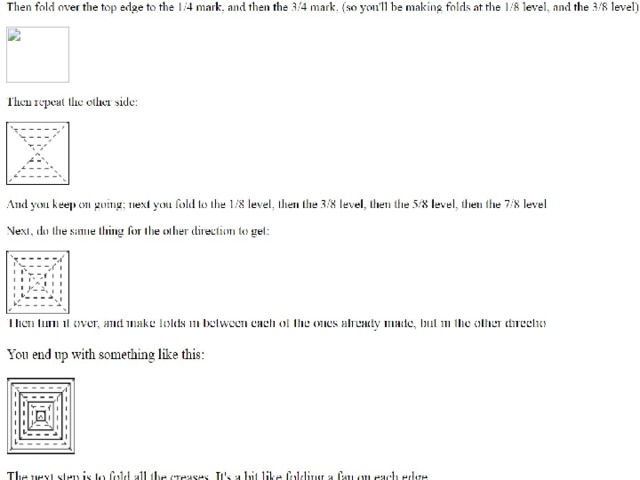
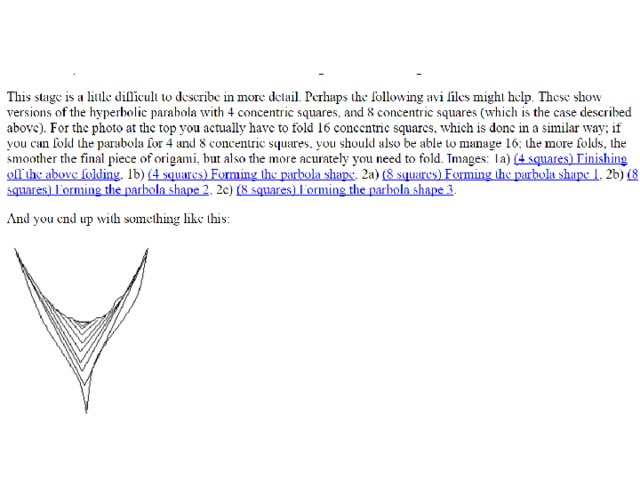
Origami Hyperbolic Parabola
Вебинар для учителей

Свидетельство об участии БЕСПЛАТНО!

